怎么使用Vue+Echart实现利用率表盘效果
这篇文章主要介绍了怎么使用Vue+Echart实现利用率表盘效果的相关知识,内容详细易懂,操作简单快捷,具有一定借鉴价值,相信大家阅读完这篇怎么使用Vue+Echart实现利用率表盘效果文章都会有所收获,下面我们一起来看看吧。
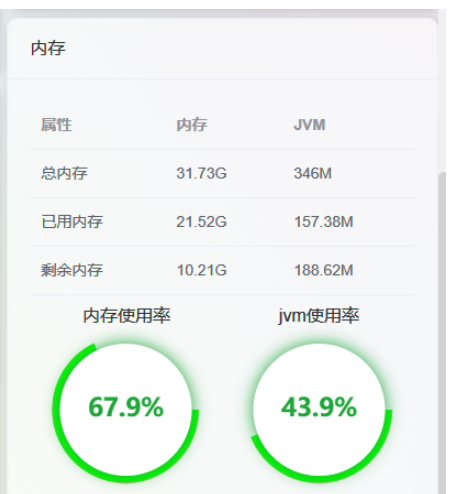
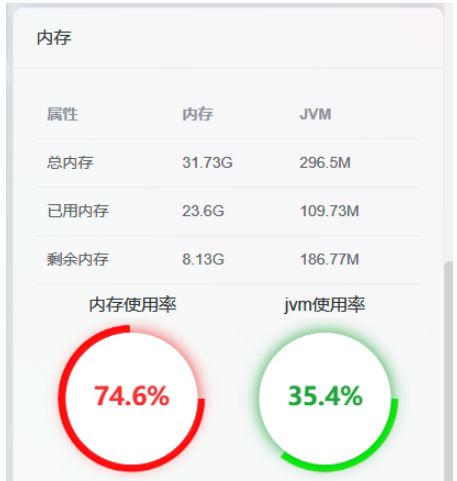
效果演示


组件
里面对应两个图片资源,panelBackground_red.png 和 panelBackground_green.png,请前往百度网盘进行下载。如果喜欢其他颜色,可以使用.psd来修改导出就行。

在使用组件之前,记得引入echart组件,可以参考echart组件引入
<template>
    <!-- <div>占用率</div> -->
    <div id="customGaugeContainer" ref="panel" ></div>
</template>

<script>
import * as echarts from 'echarts'

var app = {};
var ROOT_PATH = 'https://echarts.apache.org/examples';
// var _panelImageURL = ROOT_PATH + '/data/asset/img/custom-gauge-panel.png';
var _panelImageURL = require("@/assets/panel/panelBackground_green.png");
var _animationDuration = 1000;
var _animationDurationUpdate = 1000;
var _animationEasingUpdate = 'quarticInOut';
//这个不改
var _valOnRadianMax = 100;
//这个不改
var _pointerInnerRadius = 60;
//外轮廓半径
var _outerRadius = 110;
//内轮廓半径
var _innerRadius = 100;
//里面白色远的半径
var _insidePanelRadius = 100;
var _fontSize = 50;
var _currentDataIndex = 0;
var _shadowColor = '#20A53A';
var _textColor = '#20A53A';
var _shadowBlur = 20;

export default {
    name: 'SmartSchedulingSystemCustomGauge',
    props: {
        rate: {
            type: Number
        },
        timeChange: {
            type: Number
        }
    },

    watch: {
        rate: {
            handler(newValue, oldValue) {
                // console.log("刷新表盘数据")
                // console.log("oldValue:" + oldValue)
                // console.log("newValue:" + newValue)
                // console.log("rate:" + this.rate)
                //刷新表盘数据
                this.setOptions();
            },
            deep: true
        },
    },

    data() {
        return {
            myChart: undefined,
            scheduledTask: undefined,
        };
    },

    mounted() {
        this.$nextTick(() => {
            this.initChart();
            window.addEventListener('resize', this.myChart.resize());
            // this.setScheduledTask();
        })
    },

    methods: {
        initChart() {
            let dom = document.getElementById('customGaugeContainer');
            let clientHeight = dom.clientHeight;
            // console.log("clientHeight:" + clientHeight)
            _outerRadius = (clientHeight / 2) * 0.9;
            _innerRadius = (clientHeight / 2) * 0.8;
            _insidePanelRadius = (clientHeight / 2) * 0.8;
            _fontSize = (clientHeight / 2) * 0.3;
            _shadowBlur = (clientHeight / 2) * 0.2;

            // this.myChart = echarts.init(dom, null, {
            //     renderer: 'canvas',
            //     useDirtyRect: false
            // });
            this.myChart = echarts.init(this.$refs.panel);
            this.setOptions();
        },
        setOptions() {
            if (this.rate > 80) {
                _shadowColor = '#F33333';
                _textColor = '#F33333';
                _panelImageURL = require("@/assets/panel/panelBackground_red.png");
            } else {
                _shadowColor = '#20A53A';
                _textColor = '#20A53A';
                _panelImageURL = require("@/assets/panel/panelBackground_green.png");
            }
            let option = {
                animationEasing: _animationEasingUpdate,
                animationDuration: _animationDuration,
                animationDurationUpdate: _animationDurationUpdate,
                animationEasingUpdate: _animationEasingUpdate,
                //数据展示
                dataset: {
                    //100可以看成是百分比
                    source: [[1, this.rate]]
                },
                tooltip: {},
                angleAxis: {
                    type: 'value',
                    startAngle: 0,
                    show: false,
                    min: 0,
                    max: _valOnRadianMax
                },
                radiusAxis: {
                    type: 'value',
                    show: false
                },
                polar: {},
                series: [
                    {
                        type: 'custom',
                        coordinateSystem: 'polar',
                        renderItem: renderItem
                    }
                ]
            };

            if (option && typeof option === 'object') {
                this.myChart.setOption(option);
            }
        },
        /**
              * 设置定时任务
              */
        setScheduledTask() {
            this.scheduledTask = setInterval(function () {
                console.log("rate:" + this.rate)
            }, 2000);
        }
    },

};


function renderItem(params, api) {
    var valOnRadian = api.value(1);
    var coords = api.coord([api.value(0), valOnRadian]);
    var polarEndRadian = coords[3];
    var imageStyle = {
        image: _panelImageURL,
        x: params.coordSys.cx - _outerRadius,
        y: params.coordSys.cy - _outerRadius,
        width: _outerRadius * 2,
        height: _outerRadius * 2
    };
    return {
        type: 'group',
        children: [
            {
                type: 'image',
                style: imageStyle,
                clipPath: {
                    type: 'sector',
                    shape: {
                        cx: params.coordSys.cx,
                        cy: params.coordSys.cy,
                        r: _outerRadius,
                        r0: _innerRadius,
                        startAngle: 0,
                        endAngle: -polarEndRadian,
                        transition: 'endAngle',
                        enterFrom: { endAngle: 0 }
                    }
                }
            },
            // {
            //     type: 'image',
            //     style: imageStyle,
            //     clipPath: {
            //         type: 'polygon',
            //         shape: {
            //             points: makePionterPoints(params, polarEndRadian)
            //         },
            //         extra: {
            //             polarEndRadian: polarEndRadian,
            //             transition: 'polarEndRadian',
            //             enterFrom: { polarEndRadian: 0 }
            //         },
            //         during: function (apiDuring) {
            //             apiDuring.setShape(
            //                 'points',
            //                 makePionterPoints(params, apiDuring.getExtra('polarEndRadian'))
            //             );
            //         }
            //     }
            // },
            //白色中心圆
            {
                type: 'circle',
                shape: {
                    cx: params.coordSys.cx,
                    cy: params.coordSys.cy,
                    r: _insidePanelRadius
                },
                style: {
                    fill: '#fff',
                    shadowBlur: _shadowBlur,
                    shadowOffsetX: 0,
                    shadowOffsetY: 0,
                    //轮廓阴影颜色
                    shadowColor: _shadowColor
                }
            },
            {
                type: 'text',
                extra: {
                    valOnRadian: valOnRadian,
                    transition: 'valOnRadian',
                    enterFrom: { valOnRadian: 0 }
                },
                style: {
                    text: makeText(valOnRadian),
                    fontSize: _fontSize,
                    fontWeight: 700,
                    x: params.coordSys.cx,
                    y: params.coordSys.cy,
                    //字体颜色
                    fill: _textColor,
                    align: 'center',
                    verticalAlign: 'middle',
                    enterFrom: { opacity: 0 }
                },
                during: function (apiDuring) {
                    apiDuring.setStyle(
                        'text',
                        makeText(apiDuring.getExtra('valOnRadian'))
                    );
                }
            }
        ]
    };
}
function convertToPolarPoint(renderItemParams, radius, radian) {
    return [
        Math.cos(radian) * radius + renderItemParams.coordSys.cx,
        -Math.sin(radian) * radius + renderItemParams.coordSys.cy
    ];
}
function makePionterPoints(renderItemParams, polarEndRadian) {
    return [
        convertToPolarPoint(renderItemParams, _outerRadius, polarEndRadian),
        convertToPolarPoint(
            renderItemParams,
            _outerRadius,
            polarEndRadian + Math.PI * 0.03
        ),
        convertToPolarPoint(renderItemParams, _pointerInnerRadius, polarEndRadian)
    ];
}
function makeText(valOnRadian) {
    // Validate additive animation calc.
    if (valOnRadian < -10) {
        alert('illegal during val: ' + valOnRadian);
    }
    return ((valOnRadian / _valOnRadianMax) * 100).toFixed(1) + '%';
}

</script>

<style scoped>
#customGaugeContainer {
    // height: calc(100% - 20px);
    height: 100%;
}
</style>
使用方式
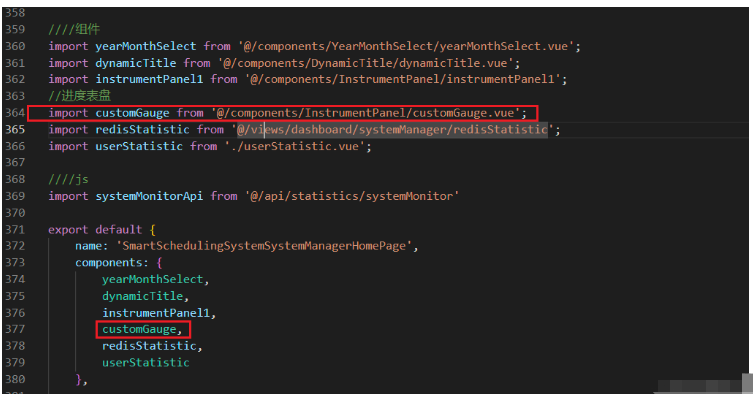
在页面引入组件

使用组件
<customGauge  :rate="server.jvm.usage">
</customGauge>
关于“怎么使用Vue+Echart实现利用率表盘效果”这篇文章的内容就介绍到这里,感谢各位的阅读!相信大家对“怎么使用Vue+Echart实现利用率表盘效果”知识都有一定的了解,大家如果还想学习更多知识,欢迎关注蜗牛博客行业资讯频道。
免责声明:本站发布的内容(图片、视频和文字)以原创、转载和分享为主,文章观点不代表本网站立场,如果涉及侵权请联系站长邮箱:niceseo99@gmail.com进行举报,并提供相关证据,一经查实,将立刻删除涉嫌侵权内容。版权声明:如无特殊标注,文章均为本站原创,转载时请以链接形式注明文章出处。


评论